Capturing the moment on your Windows screen ensures that you don’t miss any exciting moments during classes, meetings, and games. Whether you are storing important details, presenting documents, or recording games, a screen recorder is a valuable tool.
Is the built-in Windows screen capture tool enough? Probably not. If you want to record the screen with sound and customize your own background, then you need a full-featured screen recording tool. In this article, you will learn about a practical Windows screen recorder and how to use it to record screen activities on your computer to add new surprises to your Windows experience.
Why do you need to record your screen on Windows?
Screen recording on Windows is very practical in these scenarios:
Demo tutorial: If you need to teach skills and tutorials to others, you can record screen activities to show the guide for others to learn and review.
Advertising and marketing: Sometimes manufacturers need to insert screen recordings in advertisements to illustrate the concept and performance of their product.
Video sharing: If you want to share interesting video clips, you can record the screen while playing the video and save it for sharing.
Record conversations: If you want to share your chat with friends with others, whether it is voice or text, you can record the conversation interface.
-
Record computer screen with the Windows built-in tool
If you don’t have the requirement to download programs and just want to record screen activities on a basic level, the built-in screen recorder in Windows is a tool you can trust. Xbox Game Bar is designed by Microsoft. Many users think it is dedicated to games because of its name. In fact, it can also be used to record online conferences, calls and videos. The detailed tutorial is as follows.
Step 1: Turn on your Windows PC and open the screen you want to record.
Step 2: Find “Windows” and “G” on your keyboard and press them simultaneously.
Step 3: Click the menu icon in the pop-up window to set your recording preferences.
Step 4: After all the parameters are set, you can click “Record” to start recording your screen.

-
Record your screen using a third-party Windows recording tool
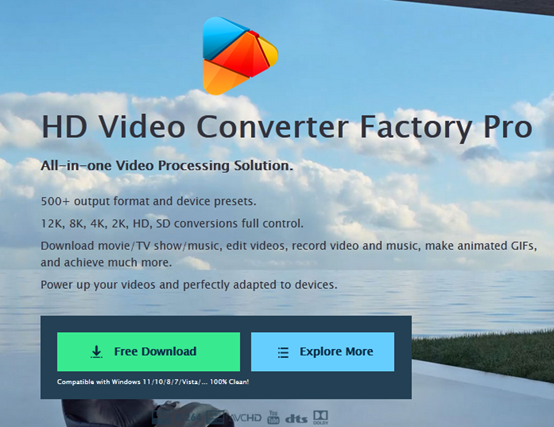
As mentioned before, there are built-in screen recording tools in Windows are far from enough. If you are looking for a full-featured third-party tool, we recommend you to try WonderFox HD Video Converter Factory Pro, which supports Windows 11, 10, 8 and 7. You can record screen activities with sound in just a few simple steps.
This all-in-one screen recorder provides multiple recording modes to capture your screen, such as recording Whatsapp calls, online meetings, games, streaming music, etc. Recording the full screen or a specific area is available. And it comes with editing tools for you to customize the recorded video, such as converting formats, editing parameters, adding subtitles, etc.

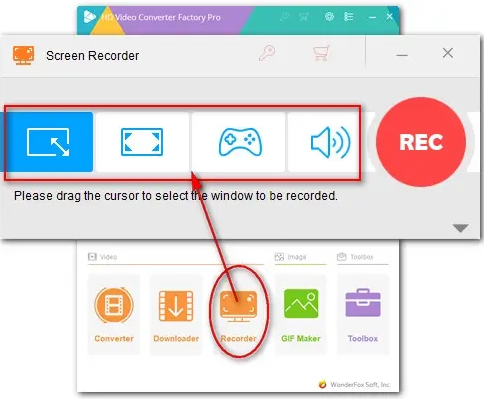
Step 1: Open this screen recorder and go to “Recorder” from its initial interface.
Step 2: Pick what you want to record. The software provides 4 recording modes: Custom, Full Screen, Game, and Audio Only. Choose the mode you want based on your recording needs.
Step 3: Select video format for recorded screen. For recorded videos, you can select MP4, MOV, AVI and other formats and then click the inverted triangle to confirm the save folder. You can also customize the quality, frame rate (up to 60fps), audio source.
Step 4: Lastly, click the red “Record” button to start recording the screen, and the recording will start automatically after 5 seconds. Click “Ctrl + F1” to stop recording.

FAQs
Does WonderFox HD Video Converter Factory Pro support recording the screen in high definition?
Yes, it allows you to capture screen activity in high definition, and you can also adjust the recording settings to choose the desired quality.
How to split screen on Windows?
WonderFox HD Video Converter Factory Pro has a built-in split screen video maker which you can find in the toolbox, which supports putting 2 screens on one screen for simultaneous playback.
Final words
Screen recording is a useful digital technology for capturing visual content on the screen for a variety of purposes, from presentations, creating tutorials to showing gameplay, so it is practical to learn how to use Windows tools to record the screen for content creators, educators, and anyone who wants to show what’s on the screen.
Windows’ built-in recording tool is suitable for basic recording tasks, but when you need more features, WonderFox HD Video Converter Factory Pro is the right choice. It can not only be used to record the screen, it is also a professional video converter, video downloader, and video editor. Try it out, we think it won’t let you down!

